If you have children at home, the last 12 weeks have been tiring, precious, 24/7!
Running out of ideas to do with your children?
To celebrate our upcoming “LEARNING TOGETHER” Week 29th June – 5th July 2020 we have 10 activities that will help you play, interact and communicate with your children to keep their brain and bodies active, using things around your house that encourage them to learn?
Why not give them a go?
Make your own slime!
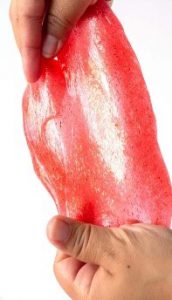
Check out a fun way to make your own slime at home, using things found in your kitchen! Edible marshmallow slime (adult needed)
Ingredients:
6 medium marshmallows, 1 tbsp. cooking oil, 1/2 tbsp. cornflour
STEP 1. Put the marshmallows in a microwaveable bowl with the oil.
STEP 2. Microwave on high for 10s at a time until the marshmallows have melted. CAUTION – HOT!
STEP 3. Add 1/2 tbsp. of cornflour and mix with a spoon.
Once the mixture is cool enough to touch, you can mix with your hands.
TIPS:
he more cornflour you add, the thicker and stiffer the slime will get. The slime will also stiffen as it cools.
Stargazing at home

Explore the constellations in our night sky from your window or garden!
When and where:
- Wait until a little after the Sun sets so it’s dark enough to see the stars. If you stargaze in summer, you’ll have to wait longer for it to be dark enough.
- Pick a spot outside where you can see the most sky, without branches or other houses in the way.
- Stand there for a little while and let your eyes get adjusted to the dark.
Pictures in the stars
- When you look at the sky you make shapes and drawings with the stars, it’s like playing connect the dots! E.g: three bright stars can look like a triangle pattern.
Astronomers – scientists who study space – have agreed on 88 official star patterns. We call these official patterns “constellations”
Talking points
- What shapes and patterns can you make using the stars?
- Can you make a story of your own using your star pictures.
- If you go out at the same time every night will the stars appear in the same place?
Sharpen your senses
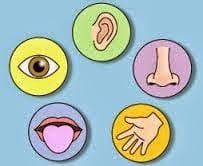
Looking closely and observing things is an important skill in science. It can help us spot important things we might otherwise miss. We can pay close attention to our senses to make new discoveries about familiar places.
Spotting the little things – you can do your observation in a room of your home, in the garden, or outside.
- Set a timer for one minute.
- During this time, pay attention to everything around you and think about what you can sense.
- List five thing you can see, four things you can hear, three things you can feel, two things you can smell and one thing you can taste.
- Challenge yourself to spot the little things you might not have noticed before: e.g, a cobweb in the corner or a dripping sound from outside.
- After a minute, talk to the people you’re with and see if you observed the same things. Everyone focuses on different things so you might be surprised by what they sensed.
Talking points
- What surprising things did you notice?
- Do you find it easier to use some senses compared to others?
- Try the challenge again, but close your eyes and focus on the other senses. Do you notice anything new?
Safety
- If you’re going outside, take an adult with you.
- Don’t touch or taste anything you’re not familiar with.
Animal behaviour

Scientists study animals to learn about their behaviour in the wild and at home. If you have a pet, you can study animal behaviour too!
Our pets aren’t able to put on safety goggles or take measurements so we study them by watching their behaviour and designing simple experiments for them. This is also a really good way of practicing lots of scientific skills like observation, recording results and making predictions.
Watching closely -the simplest way to study an animal is to sit quietly and note down what it does over a period of time. For example, watch your dog for five minutes and note down all its behaviours: sat down, went for a drink, sat down again, scratched its ear. Instead of sitting watching your pet for hours, you might set a timer and check in on it every 5 minutes.
If you don’t have a pet
- If you have a garden, you can observe birds or insects.
- If you and your family go walking for exercise, you can observe the animals you pass in the park.
- You can also study birds, squirrels and hedgehogs in long videos online where people have recorded their gardens
Talking points
- Did you learn anything new about your pet?
- Can you make a bar graph showing your pet’s behaviours and how often they happened?
- What would you change if you were doing this experiment again?
Party tricks for a lockdown birthday
Create an awesome party tricks you can try yourself to wow your family and friends.
Straw Buzzer – Can you make your own party buzzer from a straw?
Hints and tips
- Flatten one end of your straw and cut that end into a point.
- Put the straw between your lips just below where you cut.
- Blow firmly.
- Imagine blowing a raspberry, not blowing out a candle.
Blowing causes the straw to vibrate. This vibration passes through the air to our ears, where we hear the sound. Sound travels as a wave. Changing the length of the straw changes the length of the sound wave. This changes the pitch.
Safety
- Adult supervision may be required when using scissors.
- The cut end of the straw may be sharp.
What else can you think of as a party trick? Practice makes progress!
Home weather station
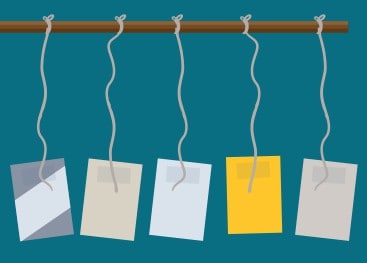
Become a citizen scientist contributing to the work of climate scientists.
You will need:
- Stick (the longer the better).
- Thin string or cotton.
- 5 materials of different weights e.g. Tissue paper, paper, foil, card, plastic.
- Scissors.
- Tape.
STEP 1 Choose 5 different materials (we used tissue paper, paper, foil, thin card and cardboard). Cut them into 4cm x 7cm rectangles.
STEP 2 Cut five 20cm lengths of thin string or cotton.
STEP 3 Knot the string onto the stick. Try to space it out as much as you can. You might want to add some tape to secure it. Once they are stuck, check that all of the pieces of string are the same length. You may need to trim some.
STEP 4 Tape a different material to each piece of string.
STEP 5 Place your completed wind meter outside in your garden or yard. You could poke it into some soil, or attach it to a fence so that it stands up, or you can hold it up as high as you can!
Once you have made your wind meter, watch the different materials.
- Which materials move in a light breeze?
- Which materials move in a strong wind?
- What direction are the materials being blown in? Could you use a compass to find out the direction? (most smartphones will have one)
Now that you have seen which materials move, why not head to the Met Office WOW website wow.metoffice.gov.uk, and find out the wind speed near where you live, in knots!
Could you use this information to work out what speed is needed to move each material?
Craft a cardboard maze
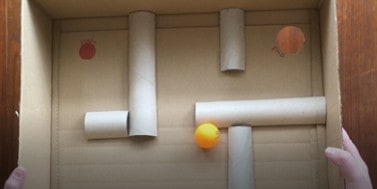
Create an intricate maze using cardboard. Can you navigate your ball through it safely?
YOU WILL NEED:
- A box.
- Scissors.
- Pen/pencil.
- Tape/glue.
- Spare card, we used cardboard tubes.
- A small ball.
STEP 1 Open one of the biggest faces of the box. • Take care using scissors, especially when making
STEP 2 Plan your maze by marking it out on the inside of the box. • Make sure there is a path to the end! • Make sure the path is wider than the ball you have chosen.
STEP 3 Cut the cardboard tubes in half, folding over the sides to make flaps.
STEP 4 Stick down the flaps, following your maze lines.
STEP 5 Cut a hole as your destination!
STEP 6 Tip the box to roll a ball around your maze.
Try:
- Covering the open face of the maze and solving it without peeking.
- Hang the four corners with loops of string, and give each corner to a different person – can you solve the maze together?
- Using smaller balls, like marbles, so you can make a more complex maze in the same size box.
FACT:
Scientists use mazes to help them understand how animals learn. Could you make a maze for your pet?
How are Moon craters formed?

The Moon’s surface is covered in interesting features. It is covered in craters – places where objects from space, such as asteroids, have crashed into it. Using some ingredients from your kitchen you can investigate the way craters form, and have a snack at the end!
Our nearest neighbour in space is the Moon. It orbits the Earth, just like the Earth orbits the Sun. The Moon’s surface is covered in interesting features. It is covered in craters – places where objects from space, such as asteroids, have crashed into it.
Using some ingredients from your kitchen you can investigate the way craters form and have a snack at the end.
Method
Cover a cracker in your favourite spread – perhaps cream cheese or chocolate spread. Let’s call this the Moon.
- Take some small, round food: grapes, M&Ms, blueberries. These are your asteroids.
- Drop the asteroids onto the Moon. After each one pick it up before launching the next one.
- Try launching the asteroids from different angles, heights, and speeds.
- After ten impacts, stop and look at your Moon and its craters.
Understanding craters- Looking at the craters you’ve made, you’ll probably see different shapes and patterns. This is just like the real Moon. If a crater is large, it might mean a large object made it, or a smaller one with more force behind it. A round crater implies the object fell from above, while an elliptical crater suggests it hit at an angle. If a crater is overlapping another, then the one on top is newer, and the one below older. Look at your craters – what stories do they tell? After spending some time studying your Moon and its craters – enjoy eating it!
Safety
- Watch out for any food bouncing or rolling out of view. Tidy up thoroughly when you’re done.
- If you have any allergies, intolerances, or foods that you know will make you sick, don’t eat those foods.
Talking points
- Look up pictures of the surface of the Moon, what can you tell about the craters?
- Other planets and moons have craters too, look them up as well – they’re not all the same.
Sticky Note Wall Bop
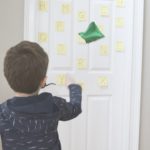
Attach 26 sticky notes to the back of a door and write a different letter on each one (in random order). Make a “start” line a few feet away from the door (more if you have older kids), and have your child stand behind it with a soft ball, bean bag, stuffed animal or pair of rolled up socks. Now instruct them to throw their object to try and hit the “A” or the “T”.
Players with more advanced aim and spelling skills can try and hit all the letters in specific words (to make it even tougher, if they miss one of the letters, have them start all over again!). or for shapes and colours try the Shape Game: Use tape/paper to create a shape, letters and/or numbers on your floor. Have your child stand on their favourite one then give them instructions to follow that will lead them to their next destination (for example: “bear crawl to the square”, “hop like a Frog to the T”, “Run to the rectangle”).
We love that this game keeps your child moving, but also helps them learn their shapes, letters and numbers!
Obstacle Course
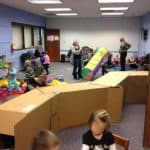
This tried-and-true idea is always a huge hit with kids, and can be made different every time so it never gets old. Make sure to create an engaging course that includes a variety of motions (jumping, crawling, balancing, etc.) and uses a large area. REMEMBER SAFETY RULES, depending on age of children, certain obstacles will be too dangerous
Have your kids help make the course (which is half the fun!) using some of these creative ideas:
- Hula hoops to jump through
- Line of tap to balance on
- Couch cushions to hop between
- Table to crawl under
- Blanket over 2 chairs to crab walk through
- Tupperware containers to hurdle over
- Stuffer animals to roll over
- Plastic cups to run around
We love that obstacle courses are great for kids of all ages to participate in – the younger tots enjoy just being able to complete all the obstacles, while older kids can race against each other or the clock. You could even have them attempt it balancing a bean bag or stuffed animal on their head, or with 1 hand behind their back. Take 10 minutes to set-up a super engaging course, and you’ll benefit from happy, worn-out kids.
Not been able to get one of our Real-time Live interactive classes, then why not try one of our Virtual areas:
- Supporting Early Years
- Supporting Primary School Aged Children
- Supporting Secondary School Aged children
29th June – 5th July 2020, with activities every hour to do with your children.
Don’t forget to book on our upcoming “LEARNING TOGETHER” Week
Sign up for a day and you will get access to all the FREE activities for that day.
We have activities Monday – Sunday!
#learntogether #precioustimeswithkids #learning #ACLEssex #FamilyLearning
Book by clicking here: https://aclessex.com/community-family-learning-online/
If you have any ideas to share or want to keep up to date with the latest workshops/courses/or support then visit our Facebook group:
https://www.facebook.com/groups/552150055488898/
To book on these or any of the workshops/courses we have on offer then click the link: https://aclessex.com/community-family-learning-online/.
Please feel free to share with any resident of Essex.


